 Jev AI
Draw to Video on Jev AI
Draw to Video for turning visual motion notes into animation
Show the movement you mean directly on an image. Draw to Video on Jev AI uses your prepared arrows, paths and short labels as guidance for a generated clip. Mark up the picture in your image editor, upload it here and choose an aspect ratio. The tool supplies the motion instructions automatically, so there is no separate prompt to write.
What is Draw to Video on Jev AI?
Draw to Video creates a video from one image containing visual motion guidance. Arrows suggest direction, curved paths describe a route, and short labels explain an action or camera movement. The tool asks the video model to animate the intended scene and omit added guidance marks from the finished clip. Each request produces one MP4 video.
Prepare the annotations before uploading. This workspace accepts the finished image and does not include a drawing canvas. Use an image editor you already know to place clear marks near the subjects they describe, then save the combined picture as PNG, JPEG or WebP. Keep the original artwork available so you can compare it with the generated result or prepare a different motion plan later.
A useful visual instruction identifies both the subject and the action. A circle can identify a car, while an arrow shows where the car should travel. A separate label can describe a camera pan. Make the relationships obvious: several crossing arrows without clear starting points can leave the intended movement ambiguous. Start with one main subject and one readable motion, then inspect whether the generated clip communicates that plan.
Draw to Video is useful for discussing a storyboard beat, testing a simple object movement or bringing an illustrated scene into motion. Its prepared direction favors a continuous shot, stable unmarked surroundings and restrained movement when guidance is unclear. Those are instructions for generation rather than a frame-by-frame animation guarantee. Review the full result for unwanted marks, altered objects or motion that differs from your intended route.
| Parameter | Specification |
|---|---|
| Source image | One required annotated image; PNG, JPEG or WebP; up to 10 MiB |
| Text input | No separate prompt required; optional action labels belong in the image |
| Available control | Aspect ratio; default Auto |
| Current output defaults | 5 seconds at 480p; duration and resolution are not editable in this tool |
| Result | One MP4 video per request |
Make the motion plan easy to read
Use a few clear marks to explain what moves and where. These original Jev AI concept images illustrate annotation ideas; they are not before-and-after frames from a tested video.
Separate subject movement from camera movement
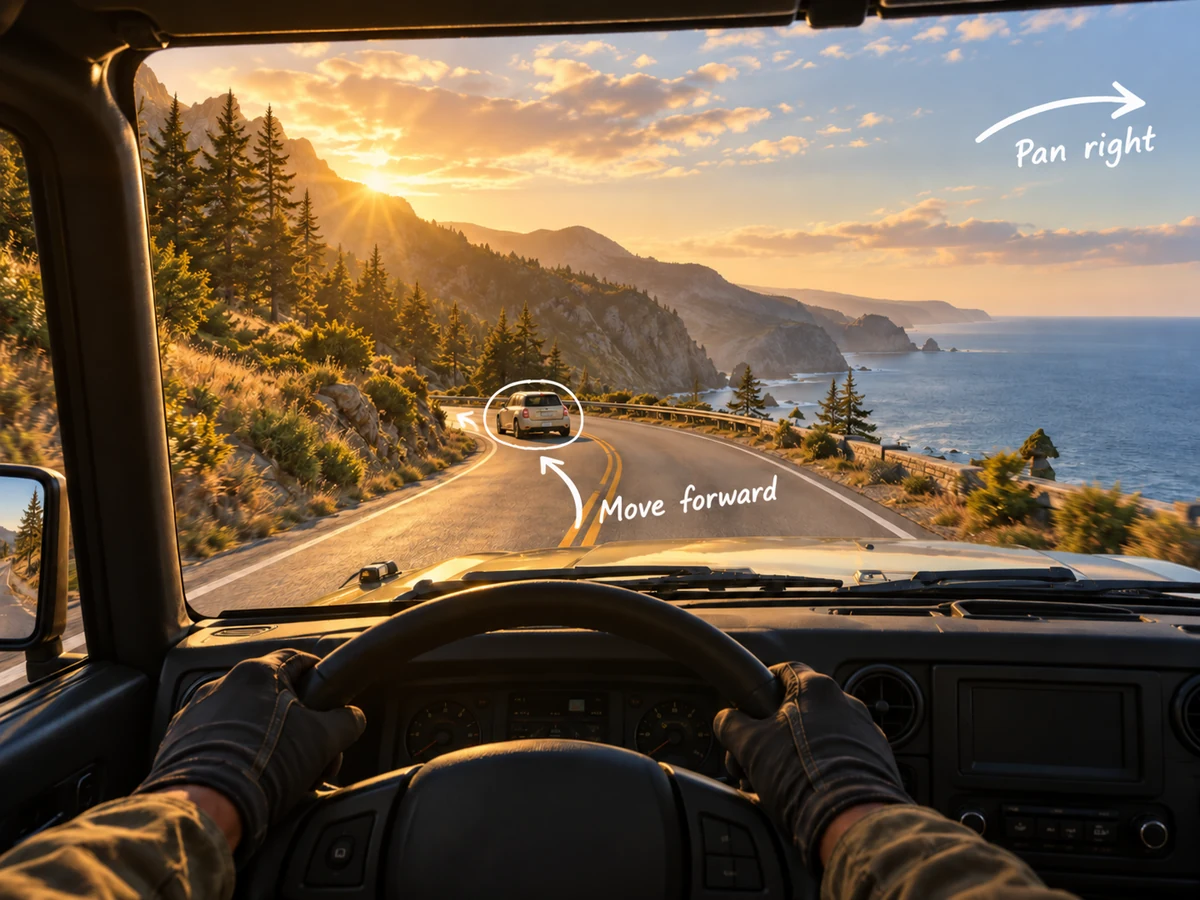
A road scene can contain two different instructions: the car moves forward while the camera pans right. In Draw to Video, those directions should be visually distinct. Identify the car without covering it, give its movement a clear arrowhead and place the camera note where it cannot be mistaken for another object instruction. If the first result mixes the motions, simplify the plan and test the car movement with a stationary camera. Review whether the car follows the intended road, remains recognizable and interacts plausibly with the scene. The goal is to communicate a motion idea clearly enough that you can evaluate the result.
Start with one object and one direction
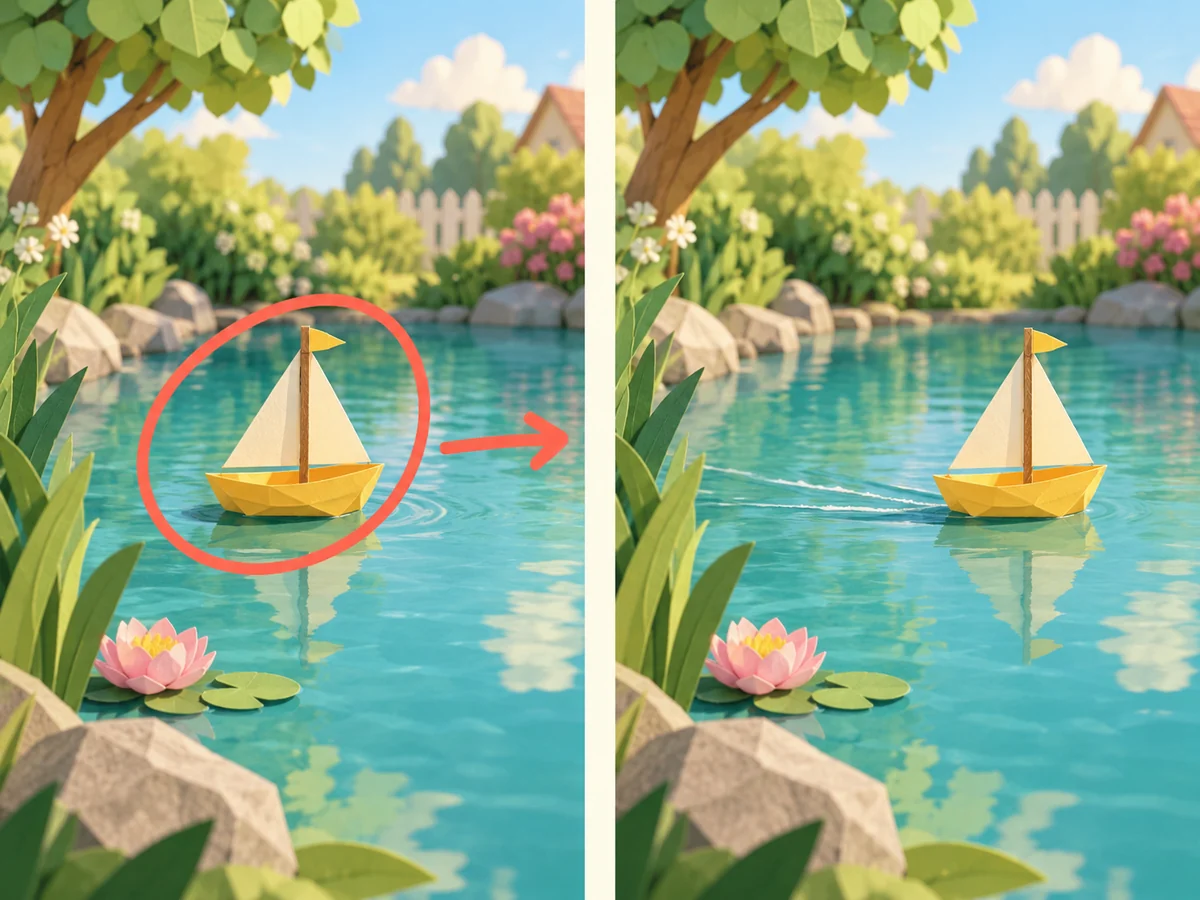
A paper sailboat moving to the right is a focused first experiment. Place a circle around the boat to identify it, then add an arrow that clearly points along the intended route. Draw to Video treats the circle as a subject marker; the directional mark communicates movement. Keep the bank, leaves and water scene readable around the annotations. The paired illustration shows the intended idea of a clean scene after the guidance marks have served their purpose. When you watch your own generated clip, check the boat’s identity, travel direction and any remaining marks, then adjust the annotated source if the instruction needs to be clearer.
How to use Draw to Video
Start with a suitable source, choose the available settings and inspect the result before using it.
Prepare an image and its motion notes
Open your source in an image editor. Add an arrow for the main movement, a curved path for a route or a short label for an action. Use a circle or box only to identify the subject. Keep marks legible and avoid covering the details needed to recognize the object.
Upload the finished annotated picture
Save one PNG, JPEG or WebP image up to 10 MiB and add it to Draw to Video. The page has no drawing editor and needs no separate text prompt. Check that you selected the annotated version, with the full subject and intended route visible in the image.
Choose framing and review credits
Keep Auto or choose a listed aspect ratio that suits the scene. The current tool uses a 5-second, 480p output configuration; only aspect ratio is editable here. Sign in to Jev AI and check the current estimate before submitting the request.
Watch the movement from start to finish
Open the available result in this tool’s history. Check direction, object identity, camera behavior and the removal of added guidance marks. Download the MP4 you want to keep. If the motion is unclear or inconsistent, simplify the annotations and submit a new request with a more focused plan.
Draw to Video questions and answers
Practical answers about preparing your source, using Draw to Video and reviewing results on Jev AI.